Chapter 07
Test the checkout and go live
First you set up shipping and tax and run through a full purchase with a test card. Once everything works, you switch to real payments. Test mode costs nothing and stays available to you.
1. Connect the cart
Your site's cart needs your site's checkout address. The plugin fills it in for you:
- In "Checkout", under "Cart buttons", click "Update cart buttons". The plugin puts the address into every cart component in the project (in Nibble, the bag in the navigation), together with the free shipping threshold and the shipping setting for subscriptions. That way the cart shows the same amounts as the checkout.
- Publish your site.
If the plugin finds no cart component, it shows the address for you to copy. It looks like this: https://kspr.online/checkout/s/your-id?items={items}. Select your cart component and paste the address into the "Checkout URL" property on the right. Leave {items} in place, the cart fills in the products there.
2. Shipping, tax and options
In "Checkout", under "Shipping", "Tax" and "At checkout", you choose what Stripe Checkout asks for and calculates. Then click "Save options". Saving also updates the cart buttons in your project, so the cart shows the same shipping as the checkout.
Shipping
- "Ship to (country codes)": the countries you deliver to, as two-letter country codes, for example
CH, DE, AT. Stripe then asks for a delivery address. - "Shipping price": a fixed shipping price per order. Empty means no shipping costs.
- "Free shipping from": the order value from which shipping is free. Empty means never.
- "Offer pickup (free)": customers can choose free pickup.
- "Subscriptions ship free": subscriptions without shipping costs (see subscriptions).
- Under "Advanced": "Stripe shipping rates (advanced, shr_…)" for your own shipping rates from the Stripe dashboard. They only apply when no shipping price is set.
Tax
- "Calculate tax automatically (Stripe Tax)": Stripe calculates tax at checkout. Stripe Tax has to be set up in your Stripe account for this.
- "Prices in the CMS include tax" (default: on): your CMS prices already include VAT, as is usual in Europe. Switch it off if tax should be added at checkout, as in the US.
- "Tax category": your products' tax category at Stripe, for example for food.
Tax settings apply to your products after the next "Update products". Which tax rates apply to you is a question for your accountant.
More options
- "Allow discount codes": customers can enter codes you create in the Stripe dashboard.
- "Ask for a phone number": for example for the courier.
- "Require terms checkbox" with "Checkbox text (optional)": customers must tick a box before paying, for example for your terms of sale or an age confirmation for alcohol. The text may link to your terms page, for example
I accept the [terms](https://yourbrand.com/terms). Your Stripe account needs your terms URL under "Settings → Public details", otherwise Stripe rejects the checkbox.
If one of your settings causes a problem for the checkout, the plugin shows "Checkout problem:" at the top with an explanation.
Subscriptions for your customers
A product with Billing Interval Week, Month or Year is a subscription: Stripe charges the amount automatically at that interval (update products).
- Mixed cart: subscriptions and one-off products can be in the cart together. Subscriptions with different intervals (for example weekly and monthly) cannot; the checkout then shows "Checkout not possible".
- Shipping: for subscriptions, shipping is charged as a recurring item, unless you switched on "Subscriptions ship free" or the order is above the free shipping threshold.
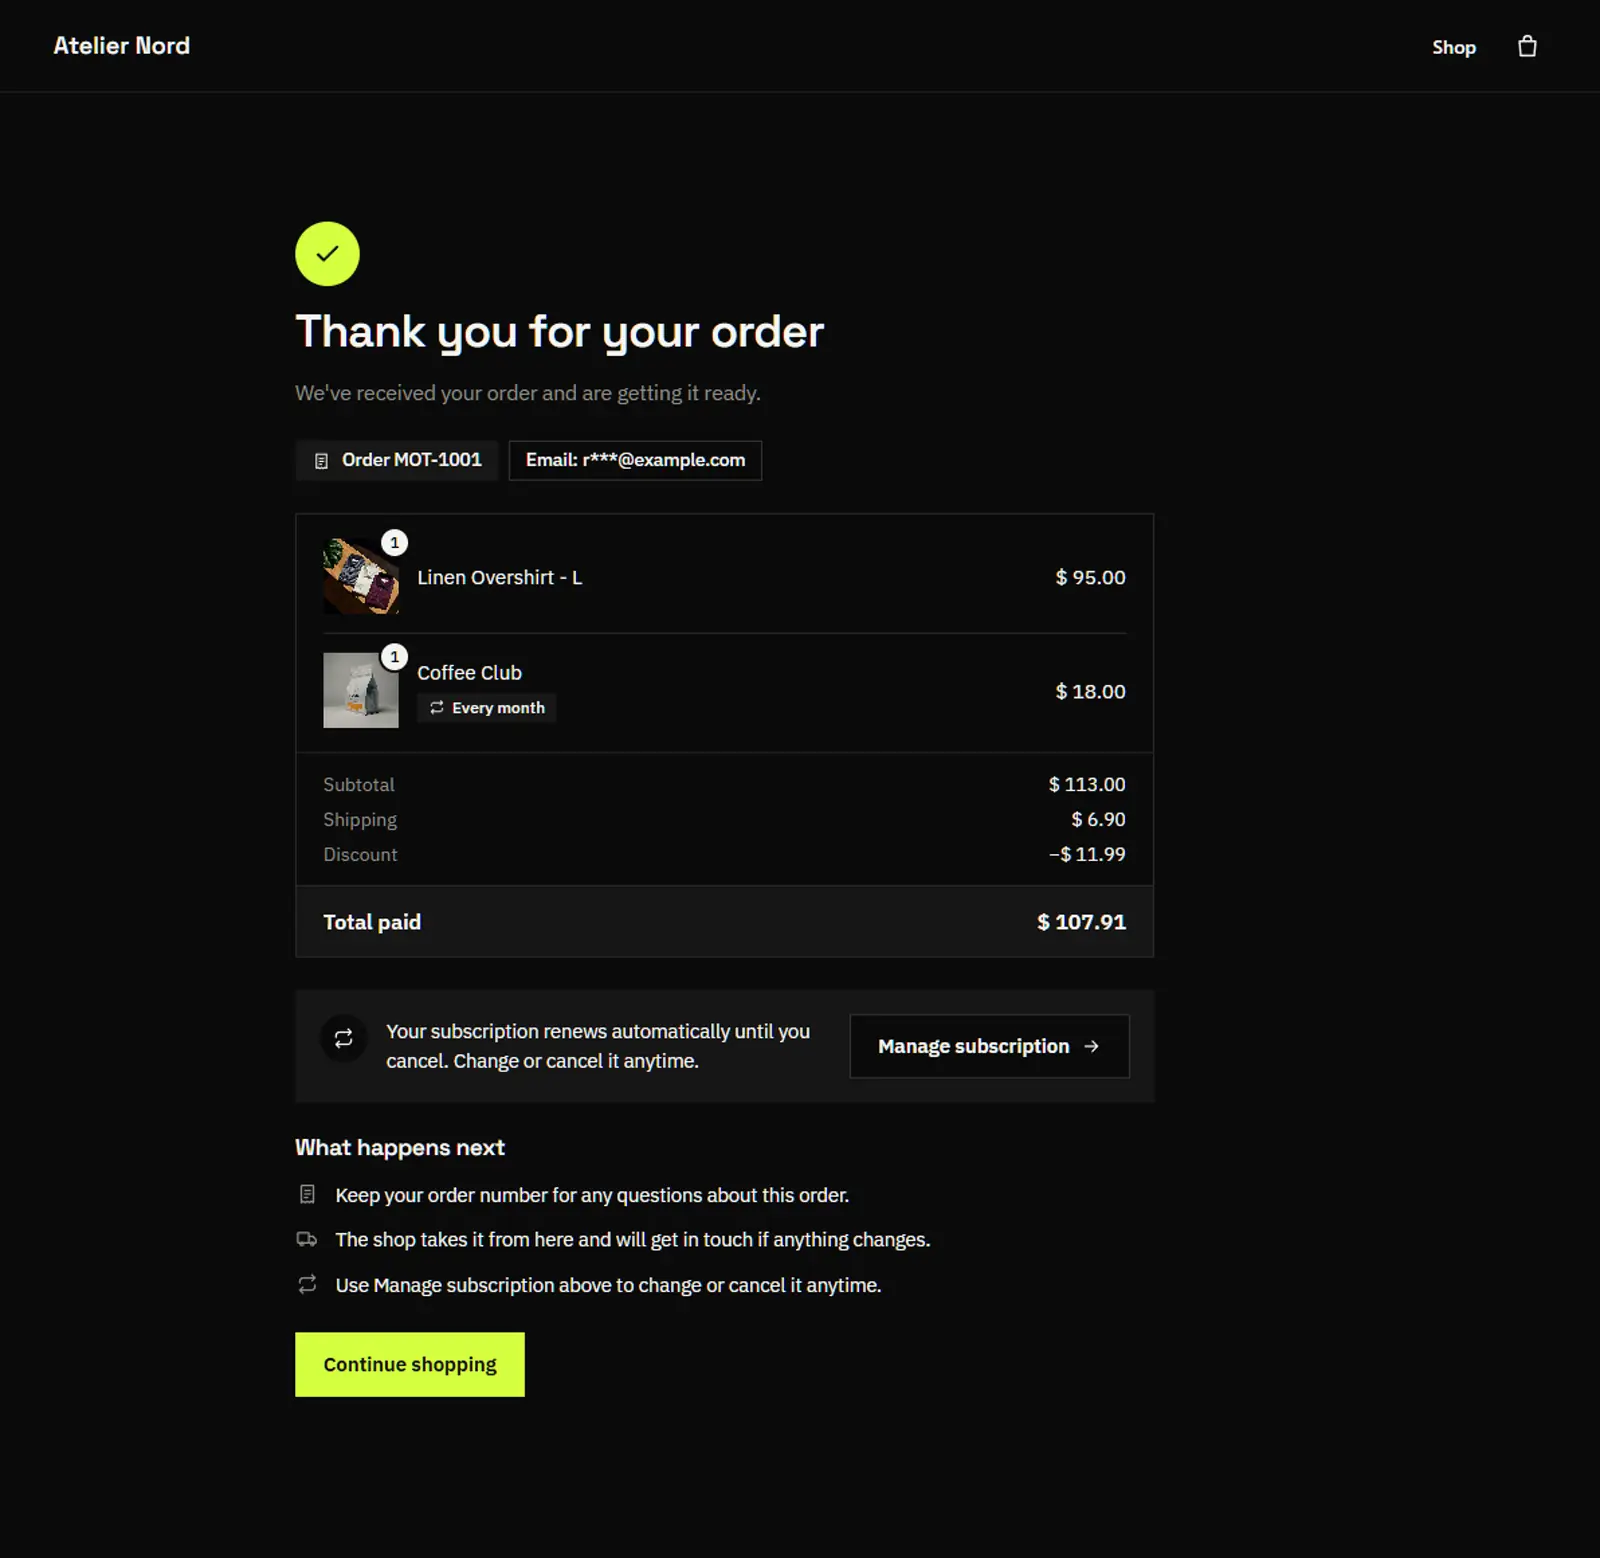
- Cancelling: your customers manage their subscription themselves through "Manage your subscription", the customer portal of your Stripe account. The link is on the thank-you page and in the email after purchase.
- Footer link: under "Subscription page for your customers" the plugin shows the address of this portal. Link it in your site's footer, so subscribers can cancel or change their card at any time.
3. Test purchase
As long as the plugin is set to "Test", all payments run in Stripe's test mode. No real money moves. Test mode is free; live, the checkout costs $9.90 a month per site (plan and pricing).
From the preview in the editor
In test mode you can buy straight from Framer's preview, without publishing and without adding a domain. The checkout opens in a new tab for this. Back in the preview, the cart asks "Finished a test purchase?" and offers to clear it. In live mode the preview does not work as a checkout; real purchases only run through your published site.
On your published site
- Open your published site (not the preview in the editor).
- Add two different products to the cart and change a quantity.
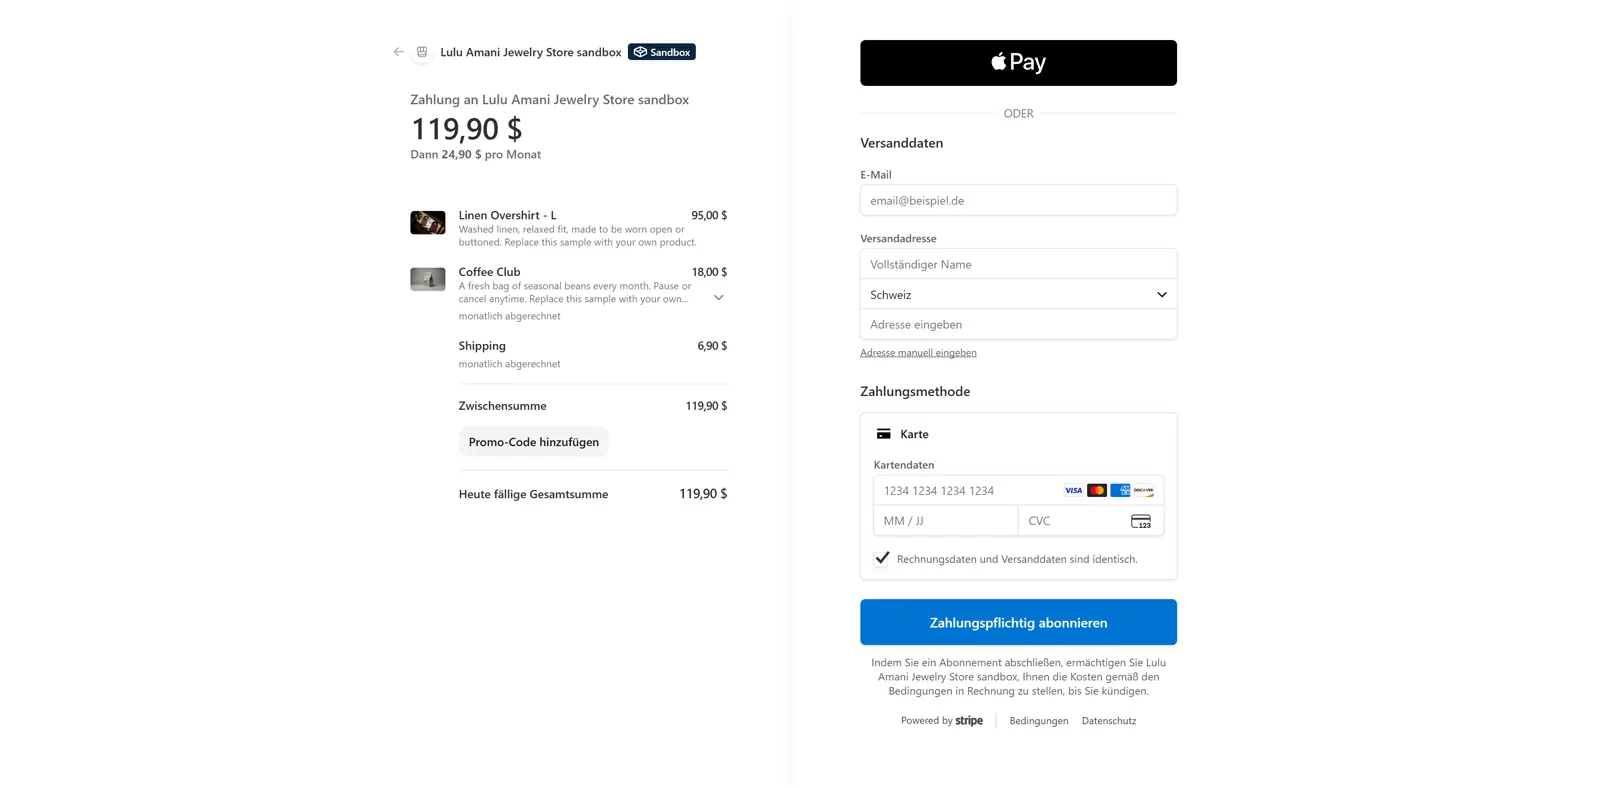
- Click "Check out". Stripe Checkout opens and shows a test mode notice at the top.
- Pay with the test card 4242 4242 4242 4242, any future expiry date, any security code (CVC) and any address.
- After paying, you land on your site's thank-you page.
- In the Stripe dashboard (test mode), check under "Payments" that the purchase arrived with the right amounts, shipping and tax.
Try the special cases too:
| Test card | What happens |
|---|---|
| 4242 4242 4242 4242 | payment succeeds |
| 4000 0025 0000 3155 | the bank asks for confirmation (3D Secure) |
| 4000 0000 0000 9995 | payment is declined |
If you cancel at checkout ("Back"), you land on your site's cancel page and the cart is kept. If you sell subscriptions, also test a subscription purchase and cancelling it through "Manage your subscription".
4. Go live
- Check your Stripe settings: the plugin shows the list "Stripe settings to check": email receipts to customers, public details (business name, support email, terms URL), Stripe Tax, payment methods and notifications about new payments. Go through each item in your Stripe dashboard.
- Stripe account complete: the plugin no longer says that Stripe needs details.
- Legal pages: imprint, privacy policy and terms of sale are filled in (legal pages).
Open "Plan" and click "Go live". The plugin shows "Before you go live":
- "Start a plan ($9.90 / month per site)"
- "Connect Stripe again for live mode": Stripe keeps test and live mode separate.
- "Update products again, live prices are separate"
- "Update cart buttons and publish your site"
- "Make one real purchase and refund it in Stripe"
- Work through the list and confirm with "Switch to live".
If you switch back to test later, the plugin warns you: while the checkout is in test mode, real shoppers cannot pay.
Payment methods
The checkout shows the payment methods you switched on in your Stripe dashboard's payment method settings, for example card, Apple Pay, Google Pay, Klarna, or TWINT where Stripe offers it. Stripe only shows what suits your customer's country, currency and type of purchase. Not every payment method works for subscriptions.
When something goes wrong
The checkout reports problems on a small page with a link back to your site:
| Message | What to do |
|---|---|
| Shop not set up yet | connect Stripe, "Update products", publish |
| Sold out | a product or variant is sold out. Customers need to remove it from their cart |
| Product no longer available | product archived or wrong Stripe ID: "Update products" and publish |
| Checkout temporarily closed | check your plan, see plan and pricing |
| Checkout not possible | different currencies or subscriptions with different intervals in the cart |
| Checkout not available | Stripe is declining right now. Check in the Stripe dashboard whether your account may accept payments |
If the checkout doesn't start when you come from your own domain, that domain is missing from the allowed websites in the plugin.