Chapter 05
Connect Stripe
Payments run through your own Stripe account. You connect it once in a Stripe window, without copying any keys. From then on, payments, payouts and refunds happen directly on your side.
How the checkout works
Framer has no checkout of its own. That is what the kspr studio checkout plugin is for:
- The cart on your site only sends which products are bought and how many.
- Our checkout service reads the prices in your Stripe account and opens Stripe Checkout on your behalf.
- Stripe takes the payment. The money lands in your Stripe account, and Stripe pays it out to your bank.
Neither you nor we ever see card details, only Stripe handles them. And because the price comes from your Stripe account, it cannot be tampered with in the browser.
Before you start
- A Stripe account. If you don't have one yet, you can create it in the Stripe window while connecting. That is enough for test mode. For real payments, Stripe will later ask for details about your business and a bank account.
- A Framer project with a cart: a remixed kspr template (remix the template) or your own project after "Set up shop" (without a template).
1. Open the plugin
- Open your project in Framer.
- Open the plugins menu and search for "Checkout" by kspr studio.
- Click "Open".
Button names are quoted here exactly as they appear in the plugin. It has two views, switchable in the menu at the top:
- "Dashboard": a large window with the sections "Overview", "Design", "Products", "Checkout", "Plan" and "Help". Numbers in the sidebar show where something is still open.
- "Compact view": a narrow window for everyday use, with the next step, "Update products", the cart buttons, your Stripe account and your plan. Everything else opens the dashboard.
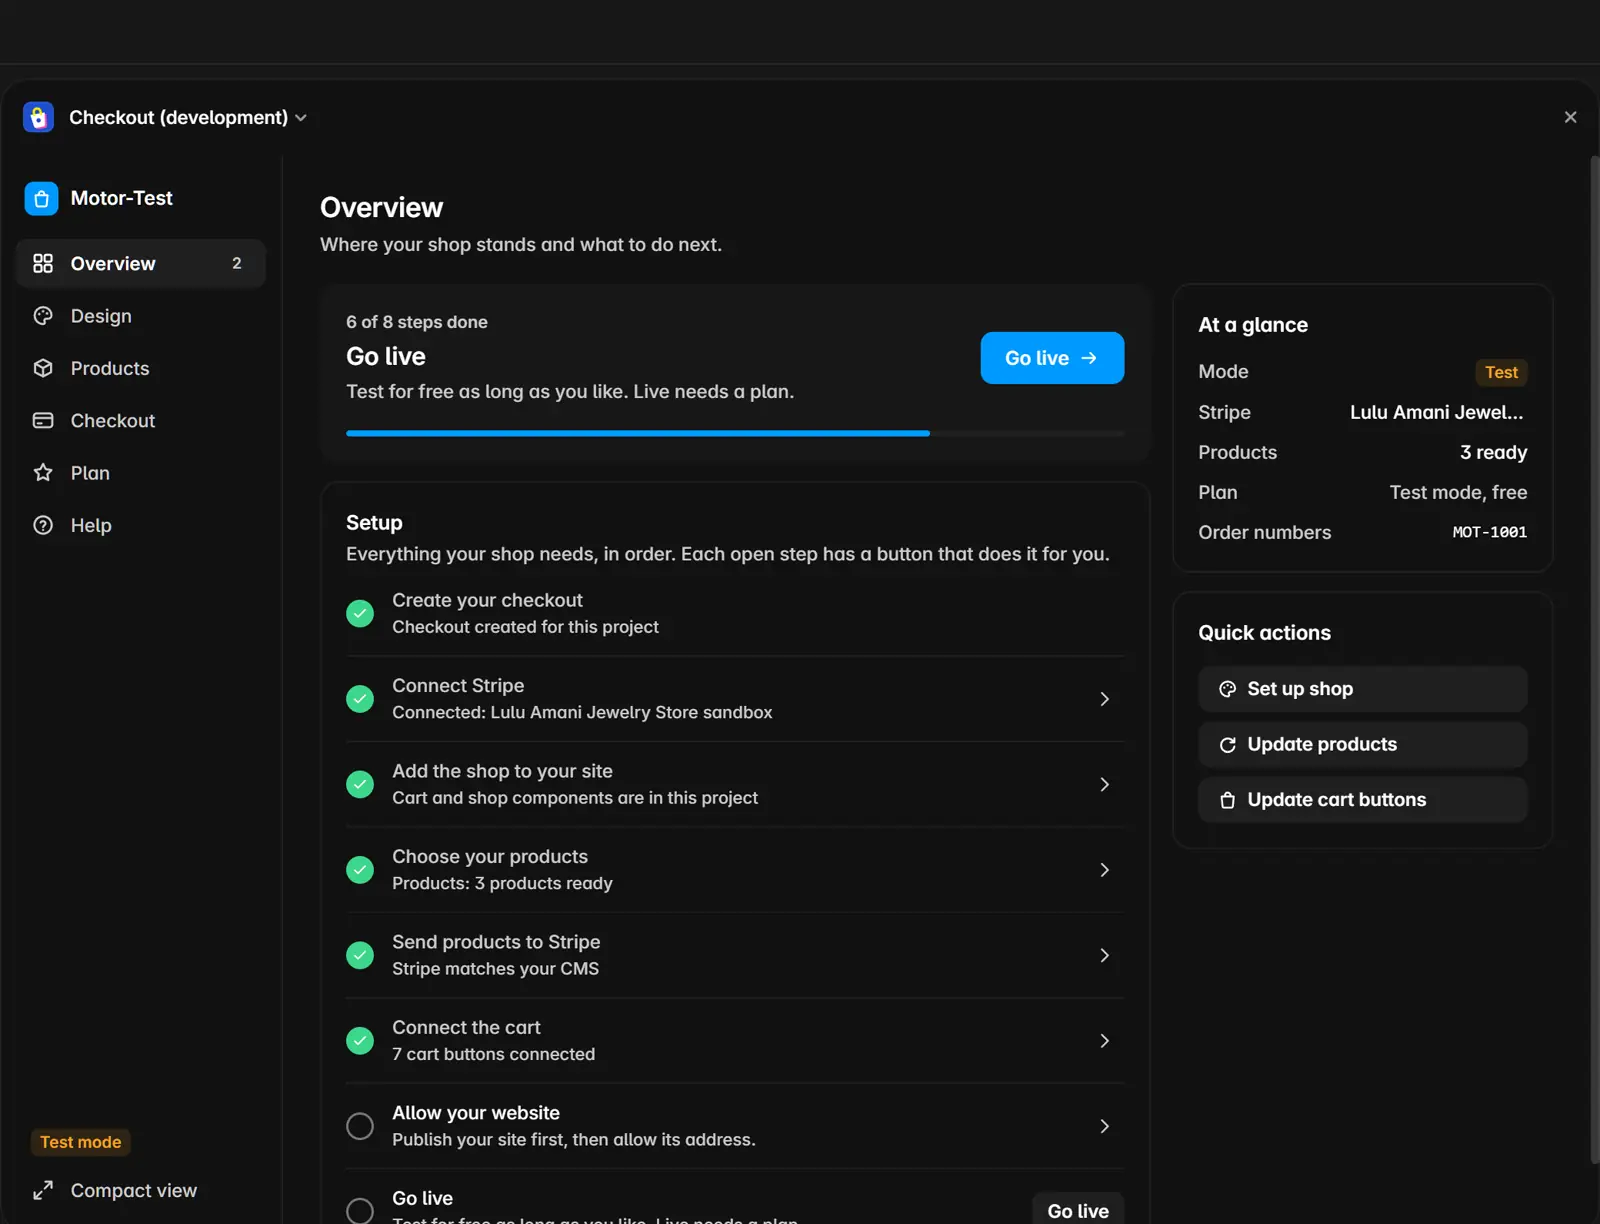
"Overview" guides you through the setup. Under "Setup" you see every step in order, and each open step has a button that does it for you. Under "Help" you'll find this guide, links to Stripe, "Support details" to copy into a support request, plus "Terms" and "Privacy".
2. Set up the checkout
- On "Overview", at the step "Create your checkout", click "Set up checkout". Nothing is charged.
- Afterwards it says "Checkout created for this project".
3. Connect Stripe
- Open "Checkout" and, under "Stripe", click "Connect with Stripe". A Stripe window opens. If your browser blocks it, the plugin shows a link instead.
- Sign in to Stripe or create a new account.
- Choose the account you want to sell with and confirm the connection.
- Close the Stripe window if it stays open. The plugin now shows "Connected" and the name of your Stripe account.
If it also says "Stripe still needs details before you can accept payments", Stripe still needs information for real payments. In test mode that doesn't matter. Before going live, you add it in the Stripe dashboard.
4. Allow your website
The checkout only accepts orders from allowed addresses. In "Checkout", under "Allowed websites":
- Publish your site if you haven't yet.
- If the plugin shows "Your published site cannot start a checkout yet", click "Allow these domains".
- Add more addresses, such as your own domain, under "Add a domain" and click "Add domain".
Test purchases from the preview in the Framer editor don't need an entry, see test the checkout.
Access and keys
The plugin stores a key in your project that lets it manage your checkout. The menu at the top has:
- "Renew key": creates a new key. The old one stops working. Useful if a copy of your project ended up in the wrong hands.
- "Forget or delete this checkout…": "Forget in this project" only removes the key from this project, and the checkout keeps running. Do this before you share a copy of the project. "Delete checkout" deletes all data on our server and disconnects Stripe. Products and payments stay in your Stripe account. Cancel a running plan first.
If the key is missing (for example after "Forget"), the plugin tells you. With "Restore access with Stripe" you sign in to the connected Stripe account. The Stripe window then shows a six-digit code, which you enter in the plugin under "Code from the Stripe window" and confirm with "Restore access". Never give this code to anyone.
What we can and cannot do
By connecting, you allow our checkout service to create products, prices and checkout sessions in your Stripe account. Your account stays yours: payouts, refunds, taxes and payment methods are managed by you in the Stripe dashboard. You can disconnect at any time in your Stripe account settings. After that, this site's checkout stops taking payments until you connect again.
Next: update your products.